Sharing and Connecting USB Devices Using USBoNET
Congratulations! You are in the process of understanding USBoNET!
During 365-day Beta period you can test all the features of our tool. Now, we’d like to provide you with some guidance to ensure the best experience and optimal results. If you have any questions about USBoNET after reading, feel free to send them to our support team.
Local network
Definitions:
- Server: The machine sharing the USB device.
- Client: The machine connecting to the remote device.
Launching the USBoNET Application:
Start the USBoNET application.![]()
On the left side, find tabs for Devices and Ports, which are used for working with local devices and ports.
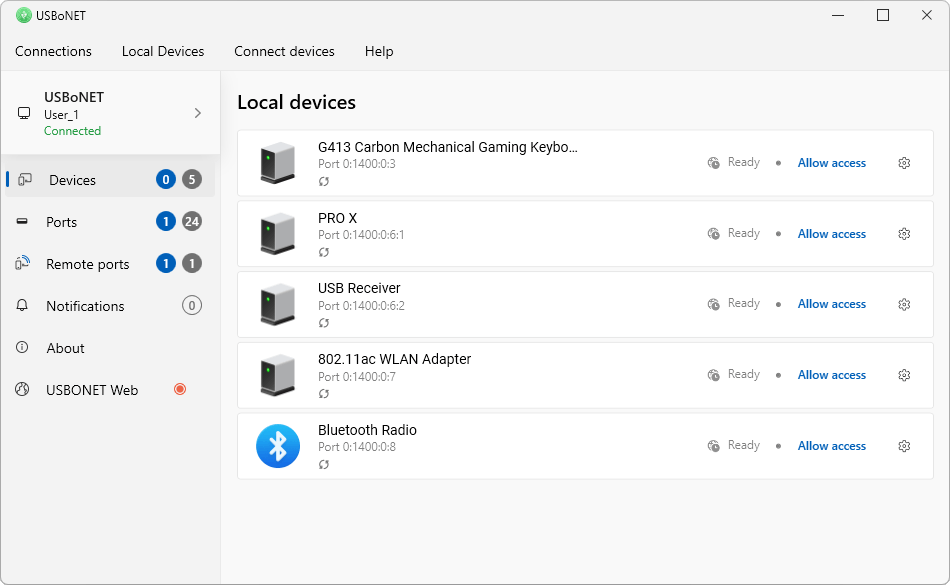
Devices Tab: Lists devices connected to the current machine.
Ports Tab: Lists USB ports registered in Windows; not all may physically exist in your computer.
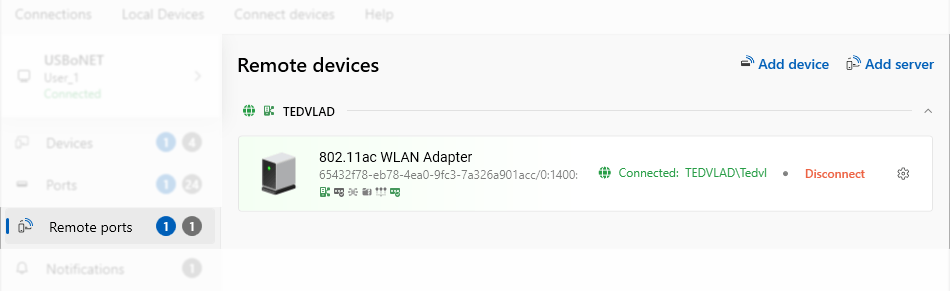
Remote Ports Tab: In the “Remote Ports” tab, find ports shared by other machines and those you shared.
⚠ Caution: It’s not recommended to share keyboards and mice to avoid loss of control over the machine.
Shared devices/ports can be connected to your own machine, applying isolation for exclusive access.
Sharing a Device
1. Switch to the “Devices” tab.
2. Find the desired device in the list and click “Allow Access.”
(After this, the device will be disconnected from Windows, and you won’t be able to interact with it on the client machine.)
Connecting to the Device on the Client Machine:
Switch to the “Remote Ports” tab.
You will see the device available on the network.
Click “Connect,” and the device is now connected.
Fine-tuning Server Ports
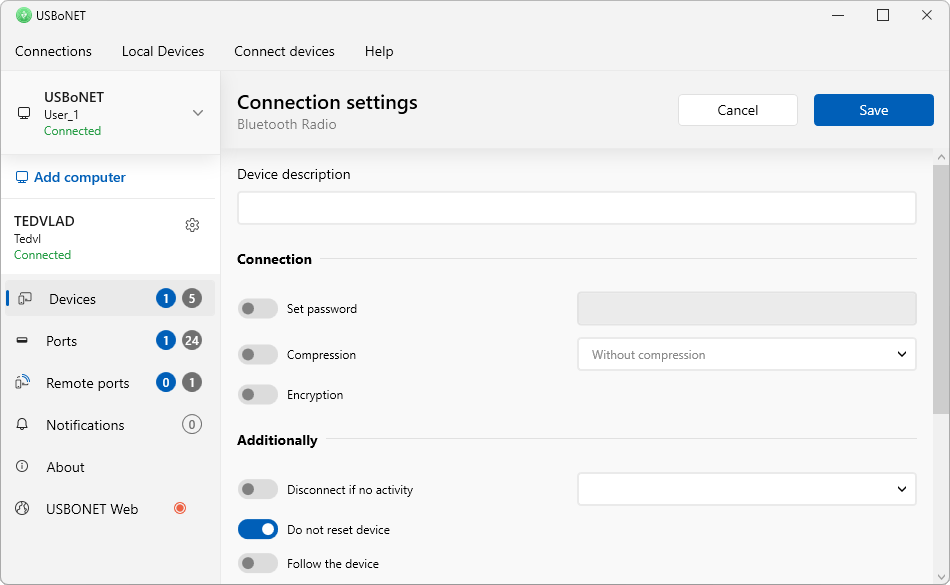
In the “Devices” tab, select the desired device, click ![]() (the gear icon) for settings:
(the gear icon) for settings:
– Device description: Provide a textual description visible to other machines on the network.
– Set password: Set a password for network access to your device.
– Compression: Compresses all packets transmitted over the network.
– Encryption: The established connection between two machines will be secured through the use of public and private keys, ensuring comprehensive protection against any interception of traffic.
– Follow the device: Makes the program track the device, automatically switching the shared port.
– Can be Relayed: This function allows using the specified port in gate mode. It’s useful when you want to utilize a specific port in a special gate mode.- Restore on Start: Ensures the device is restored after a sudden system reboot without user login.
Command-Line Interface (CLI) for USBoNET:
The terminal command “uoncli” is available in C:\Program Files\High Figure\USBoNET\GUI.
An automatic command generator is provided for ease of use and exploration.
Fine-tuning Client Ports
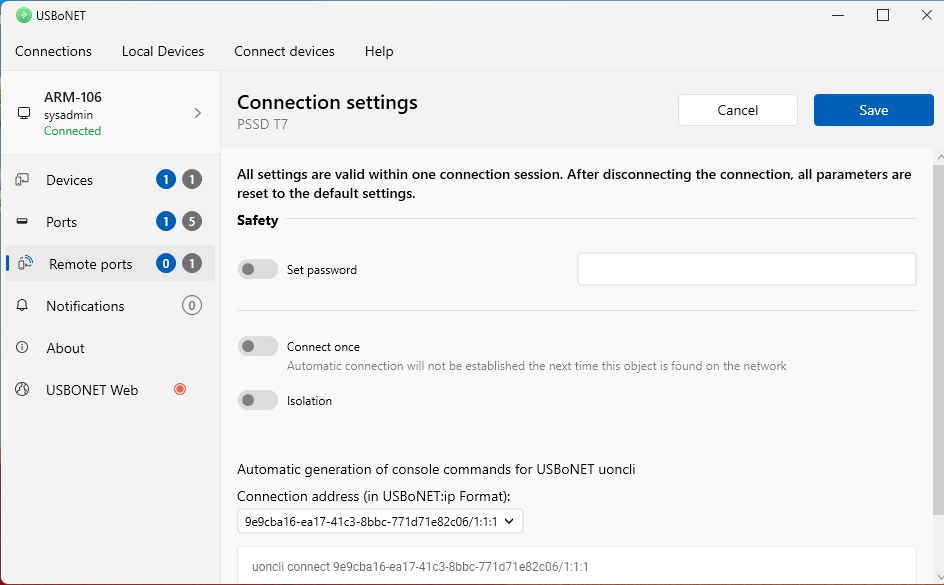
Set Password: Enter the same password set on the server side.
Connect Once: If you need to connect the device only once, without attempting reconnection if it’s disrupted.
Isolation: When connecting with this option, the device is accessible only to the user who connected it, providing security for confidential data.
Select Preferred Device: If your machine has multiple network devices, choose which one to use for the connection manua
Example: If your machine is connected via both Ethernet and Wi-Fi, select the faster connection. If not chosen manually, the system will automatically use the first-listed network device.
Automatic Command Generation Using uoncli:
Example command: "uoncli connect ad427700-7644-43a6-b61d-bb2392341109/0:1E00:1B00:0:1 --auth=123 --connectonce --isolation."

Note: Enabling these settings will be reflected on the device panel for easy monitoring without delving into settings.