How to set up remote audio connection on the desktop
Remote desktop software is useful for administration, technical support, and presentations. The software allows employees to remotely access another PC or other ICT system and its operations in real-time. The software will enable users to control other devices remotely. The remote desktop can be used for support, solving technical problems or performing maintenance on multiple devices from a single workstation.Our High Figure company offers a wide range of options for companies that want to save time on lengthy connections to PC devices. You can now manage your PC remotely and utilize its resources wherever you are. One such popular connection is audio through a remote desktop. Below, we will tell you how to set it up on different devices
Remote desktop with audio is an effective way to save time
Connecting to a remote desktop is now standard practice for many employees. Accessing a central computer or workstation in the office from the outside is a crucial part of the job. Home users in the home office also benefit from using the extension because they can conveniently access their office computer. This means that your home computer can use all the programs, files, and network resources of the office computer, just like at work. The need for access to application programs and files from outside the corporate network is constantly increasing.
This type of remote desktop access is particularly suitable for employees or colleagues working from home, who are often in different locations and need access to application software and company data. A range of devices can be used for this purpose, from regular PCs to laptops, notebooks and tablets or smartphones. The endpoint devices used pose some risks that can jeopardize the availability, integrity and confidentiality of data.
Connecting to a remote desktop
You need to install the software to set up sound through a remote desktop. This is one of the quick and easy ways to solve remote PC access. You may need to connect to your computer or tablet at any time. Remote administration is used to solve technical problems or training needs. Remote support also plays a vital role in implementing compliance guidelines. Remote management software helps optimize performance by allowing centralized monitoring and control of systems and applications. Thin clients can help improve work-life balance by allowing employees to access their work environment from multiple locations without being tied to a specific workstation. Remote desktop services enable IT resources to be shared regardless of mobile devices and location, facilitating collaboration and data sharing in an increasingly mobile world.
How do I enable remote desktop microphone access myself?
In many software programs, audio for remote desktops is turned off automatically. Then, you have to make the setting manually. Below, you will find detailed instructions on connecting to a PC and setting up remote audio on your device.
Connecting a microphone for windows
Remote access works on any device. You can easily connect to your laptop from anywhere with Remote Desktop. To configure remote audio, check that you have an active connection to the remote desktop. Once connected, you will see an active window with additional settings. This option is located in the lower left corner. There is a local resources tab at the top. Go there for further customization. An active window with remote sounds will open. You need to select the settings option in this area. Then, you need to set a marker on the opportunity to record from this computer and save the changes. After all the settings, you can proceed to connect the remote PC control.
1. To begin, type mstsc or Remote Desktop Connection into the local computer’s search box.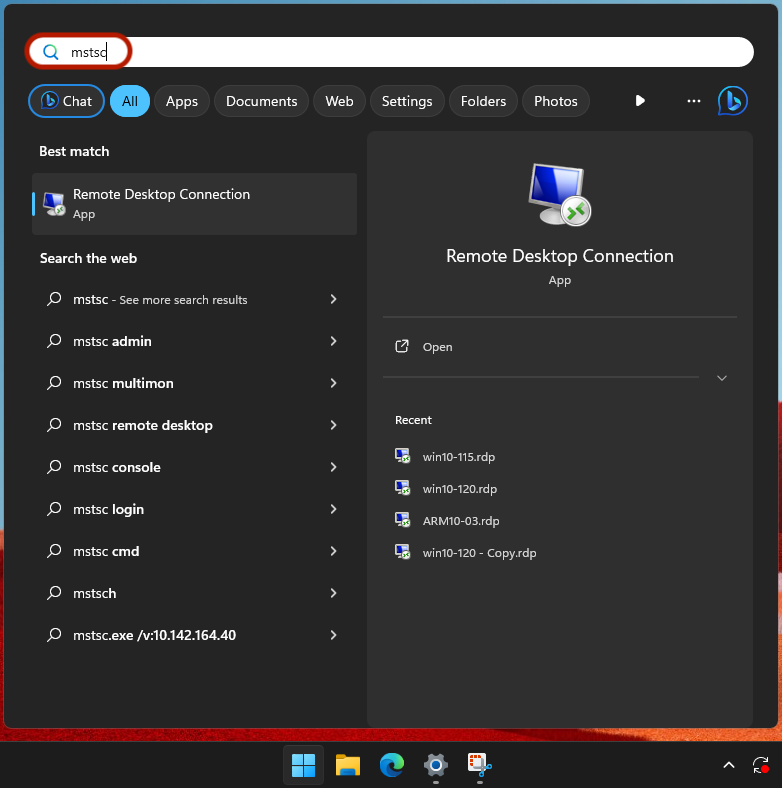
2. Next, select the Show Options drop-down menu.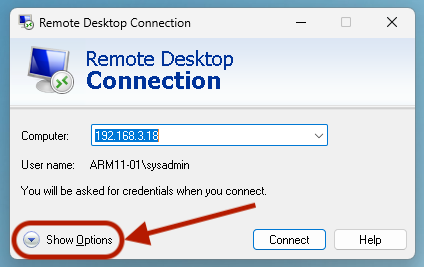
3. Proceed to the tab for Local Resources.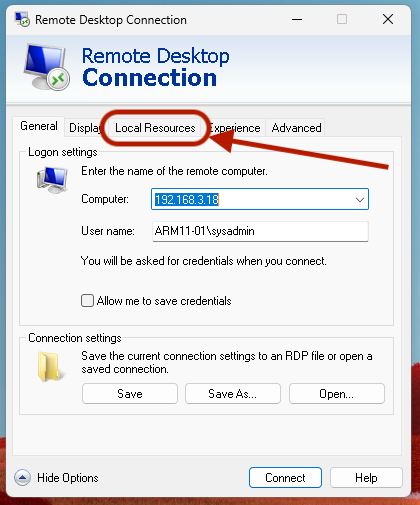
4. Next, under the Remote Audio option, click the Settings button.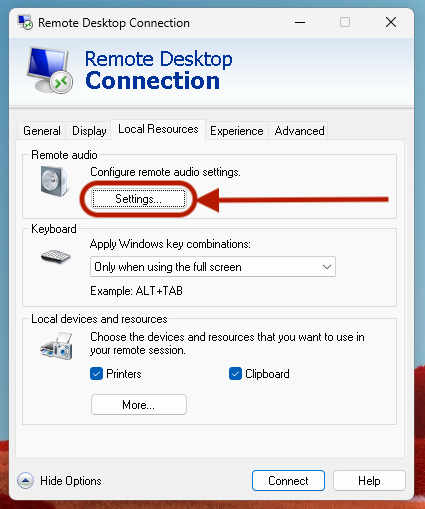
5. Then, check the box for Record from this computer, press OK, and continue to establish a remote desktop connection.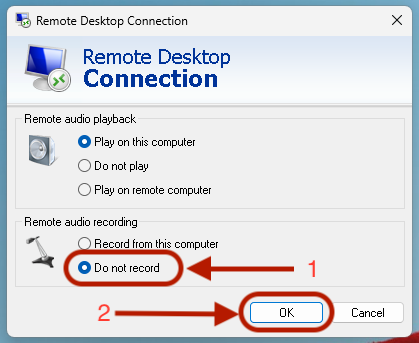
Remote access for android devices
Thanks to modern software developments, you can also set remote desktop connection sound on Android devices. All you need to do is install remote access on your device, and then you can proceed to the audio settings.
The first thing you need to do is to open the remote desktop and select the edit option. You will see the audio editing and redirecting function in the pop-up window. There is an inactive microphone button at the bottom of the opened window. You need to change its status to active. In this program, you can save changes using the button in the upper right corner. After saving, the sound RDP option will be involved.
1. Launch Microsoft Corporation’s Remote Desktop program.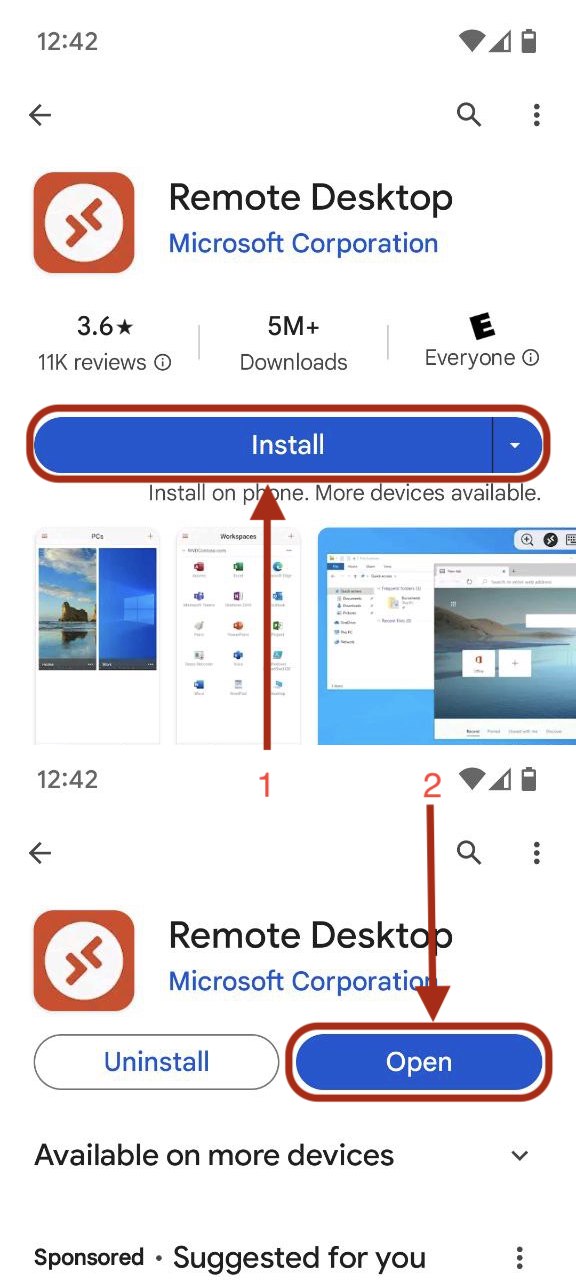
2. Next, click +, then select Add PC.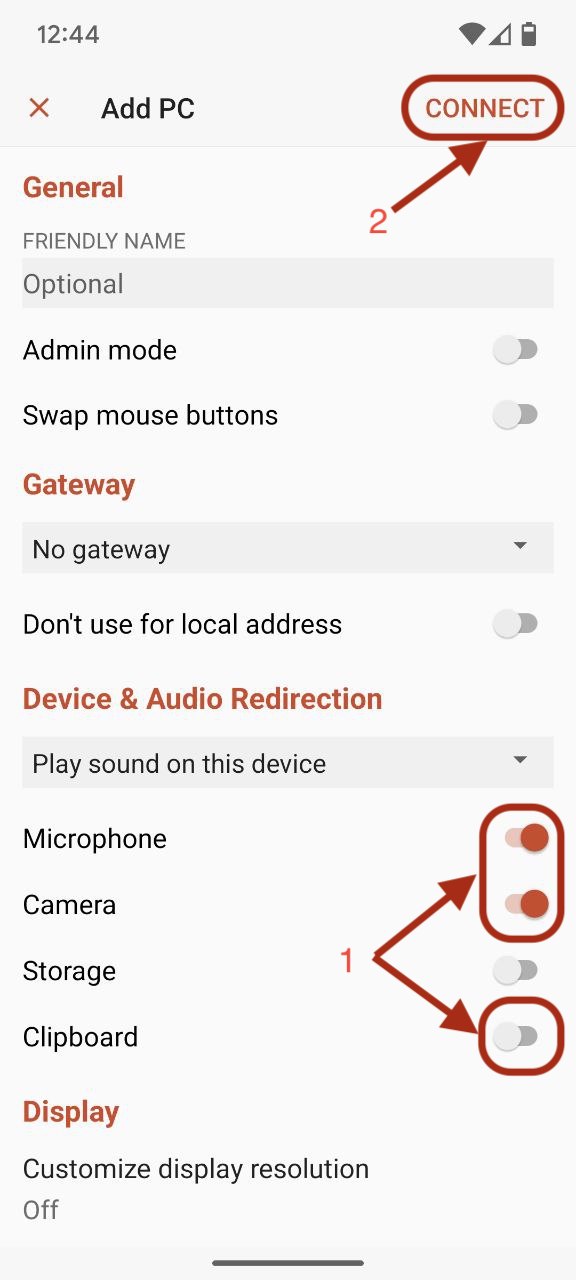
3. Next, go to the bottom of the screen to the Devices & Audio Redirection section, and select the Clipboard option.
4. Finally, to complete the modifications, click Connect.
Connecting to a macOS device
First, you need to go ahead and install remote software management on your device. You need to create an account. After that, you can proceed to set up sound through RDP.
Open the downloaded application on your device. Once opened, three dots are active in the pop-up window; you need to click on them. Then, select the edit function. The general panel will open up for you. Go to the board for audio customization. Check the active checkbox next to the word microphone. Save all changes.
1. Start by launching the Microsoft Remote Desktop program.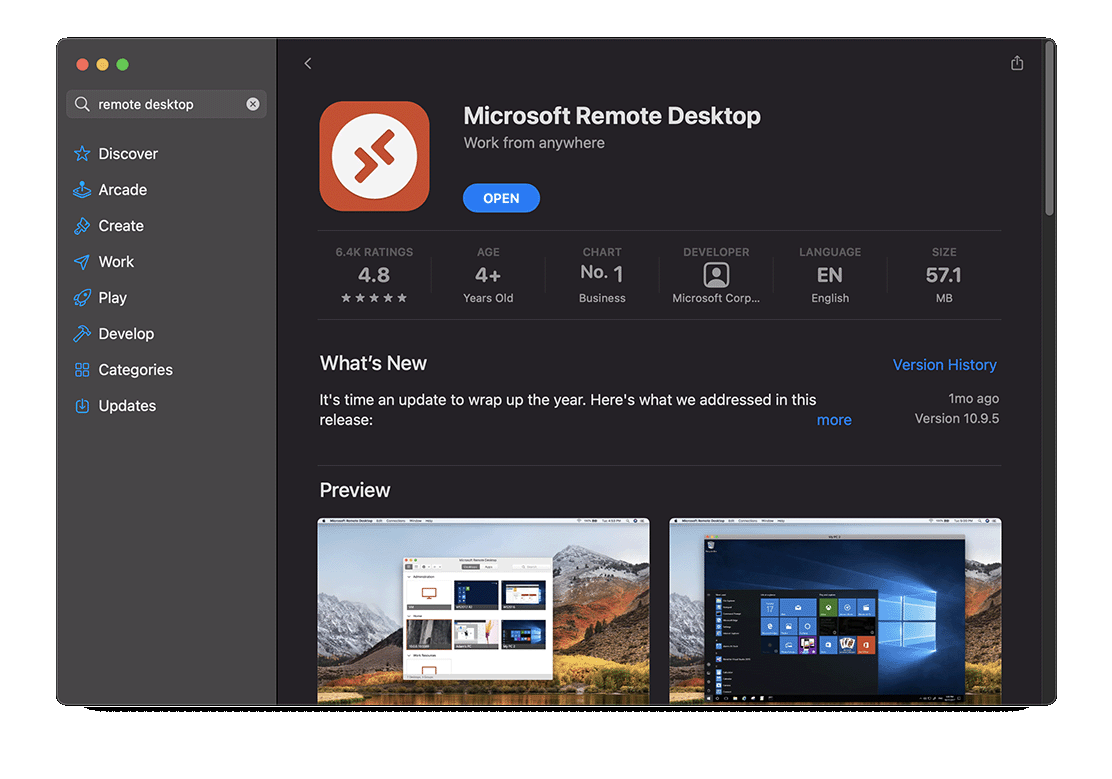
2. Enable Permission in the macOS Security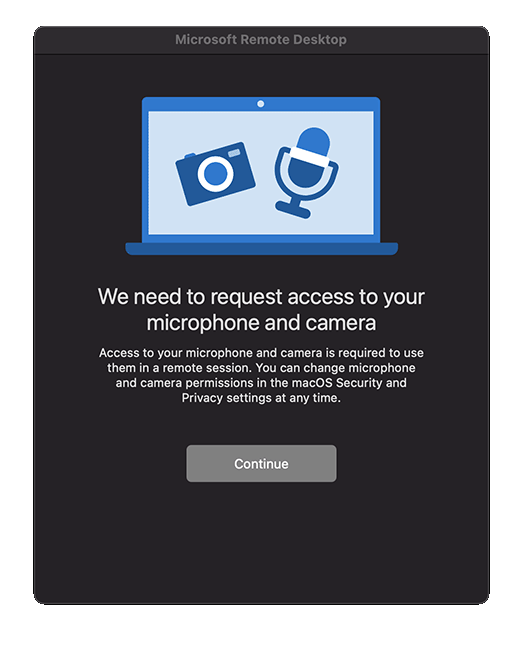
3. Click the ••• or Add PC button and choose the Edit option once Remote Desktop has opened.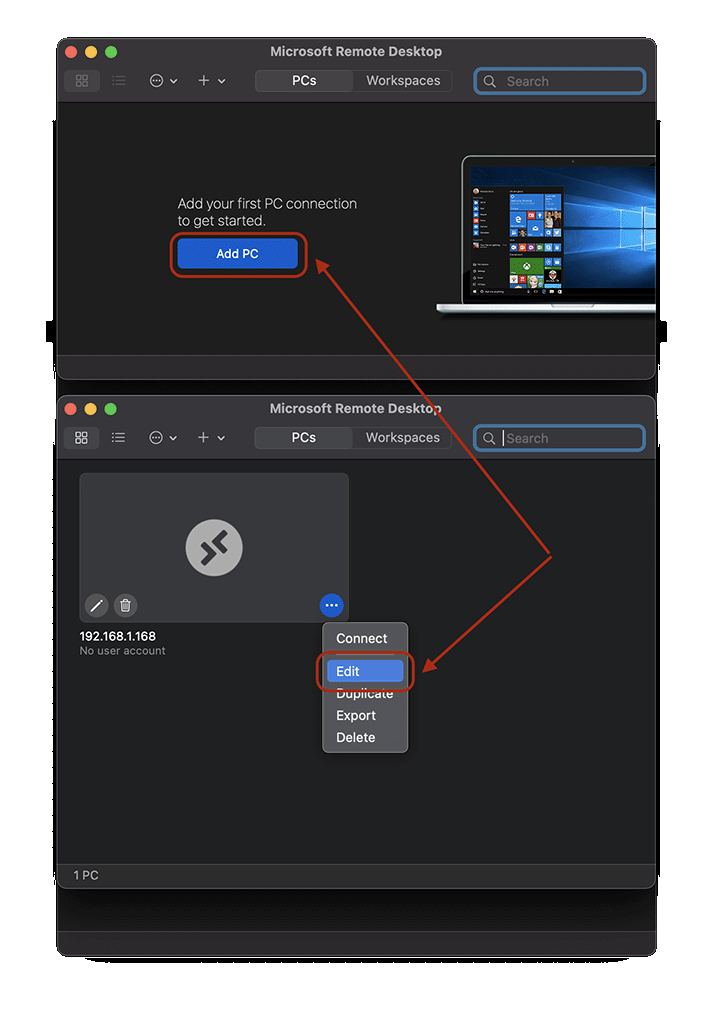
4. Proceed to the Devices & Audio tab after that.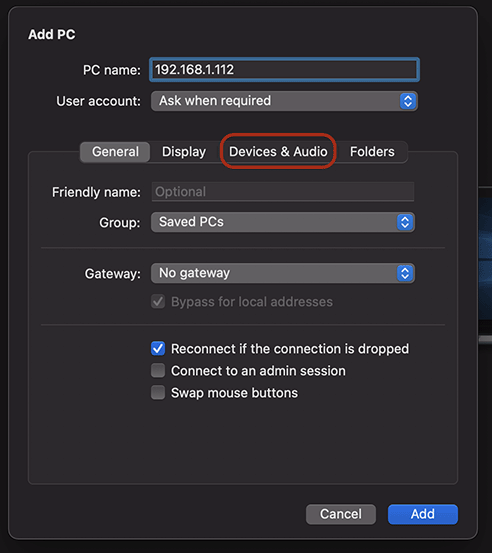
5. Next, select the option with a checkbox next to Microphone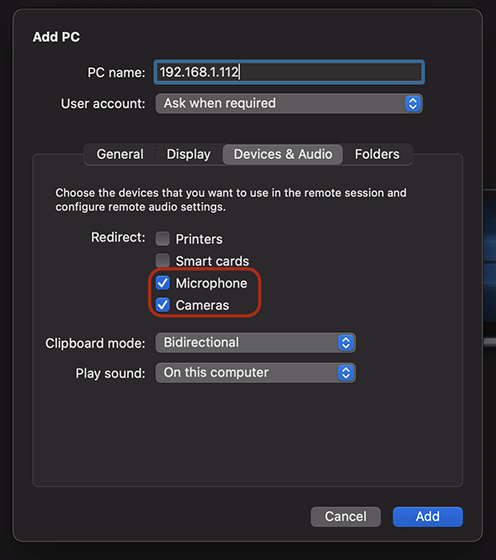
6. To complete the modifications, click Save at the end.
Connecting Audio on iOS desktop
As with previous devices, you must install the remote access software and create an account. After that, press the program shortcut to access the editing menu. You will have access to the devices and video forwarding section in the pop-up window. This will list the sounds that you have on your device. All of them will be inactive. You must click the checkbox next to the microphone to make it active. Remember to save all changes.
Final step for all remote audio configuration devices
You must perform the final server configuration to complete the microphone over remote desktop configuration. The last step is to configure the remote desktop session nodes. You will find a section for playing audio and video from the Server Manager in the client interface. To do this:
1. Go to the Windows search box after logging into your Windows server, then type Server Manager into it.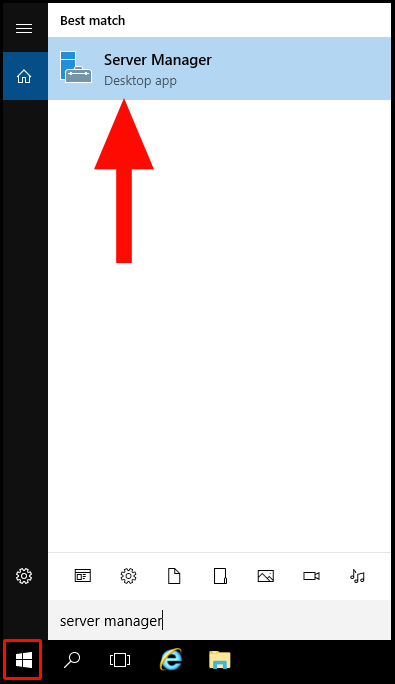
2. Click “Add Roles and Features” after that.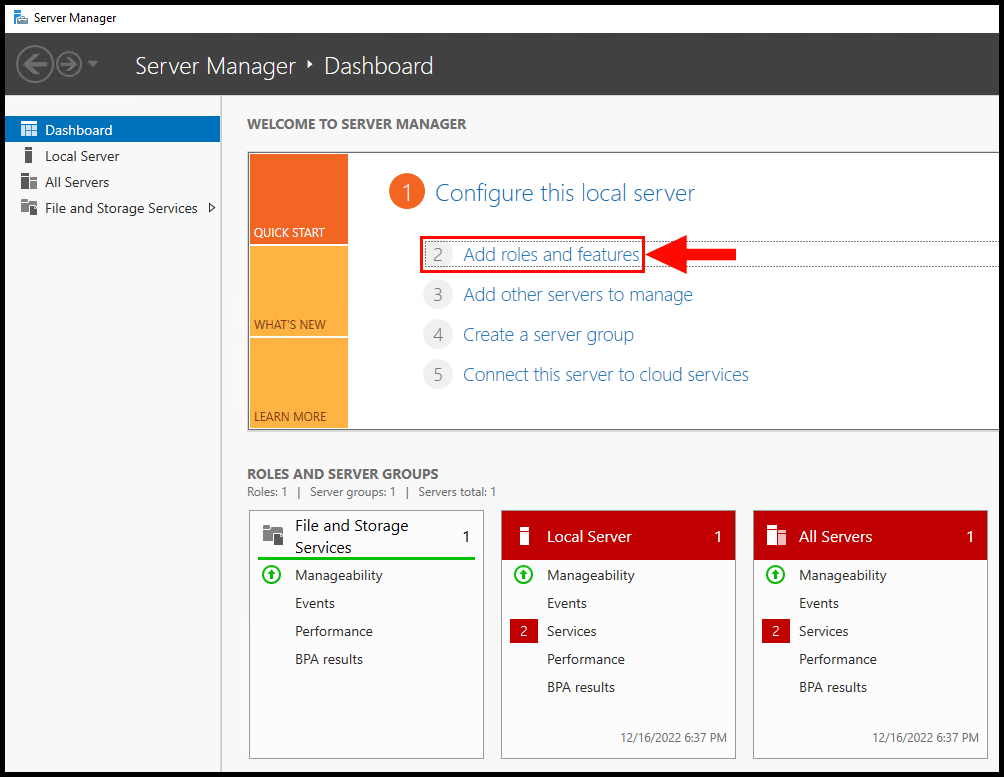
3. After that, the Add Roles and Features Wizard page will open; select the Installation Type option by clicking next.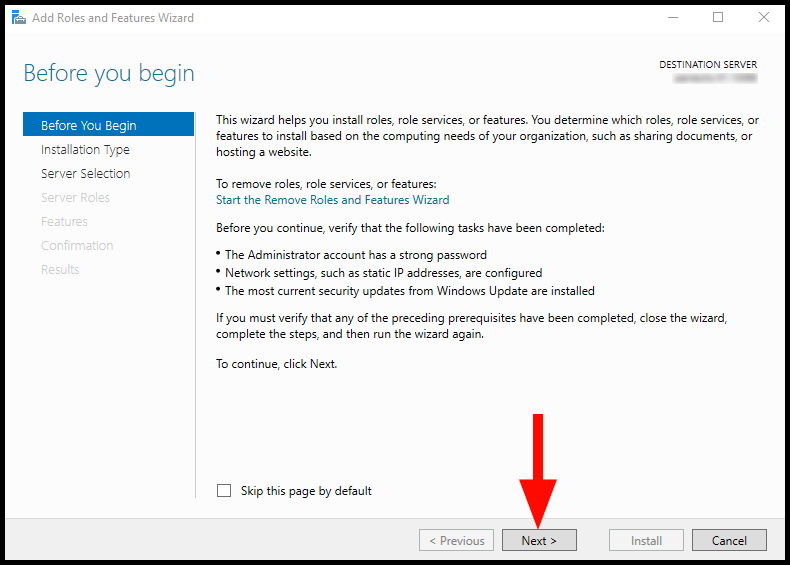
4. You can choose Role-based or feature-based installation on the Installation Type page.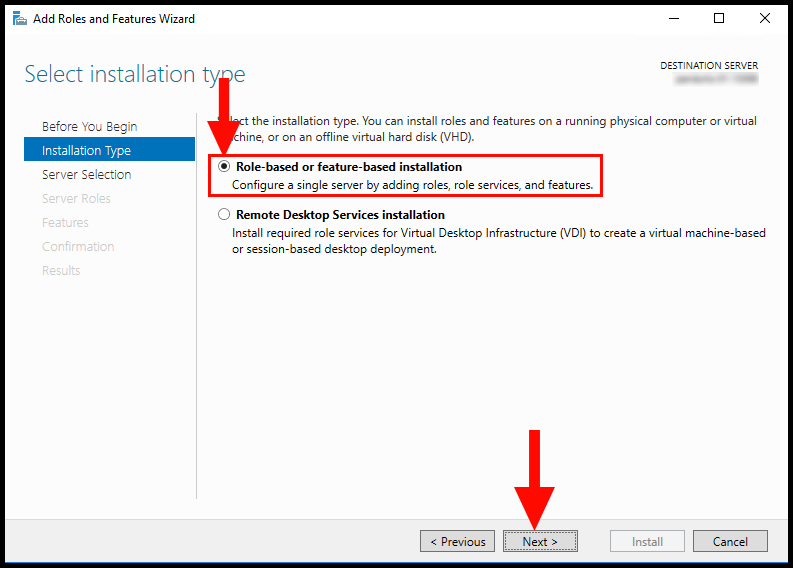
5. The Server Selection page will then show up. Choose your server in the Server Pool window by selecting Select a server from the server pool. Next, click to continue.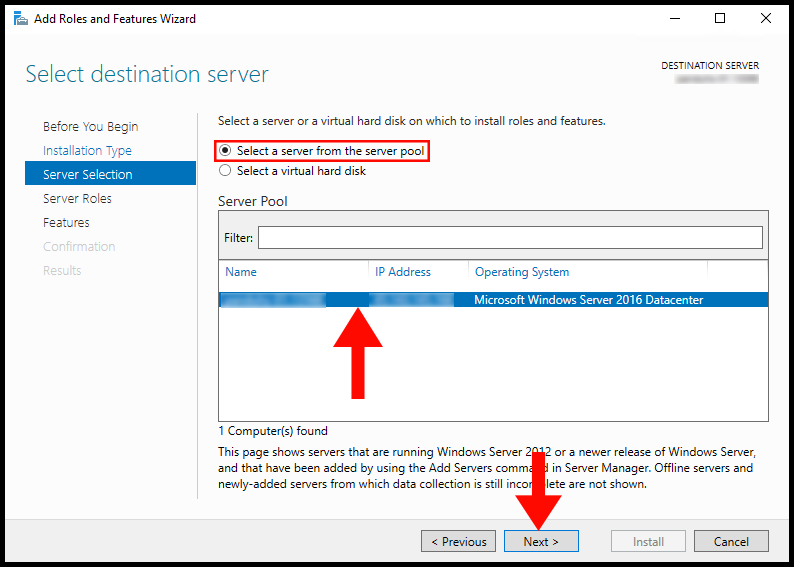
6. Select the checkbox next to Remote Desktop Services on the Server Roles page. Next, select Role Services from the menu on the left to continue.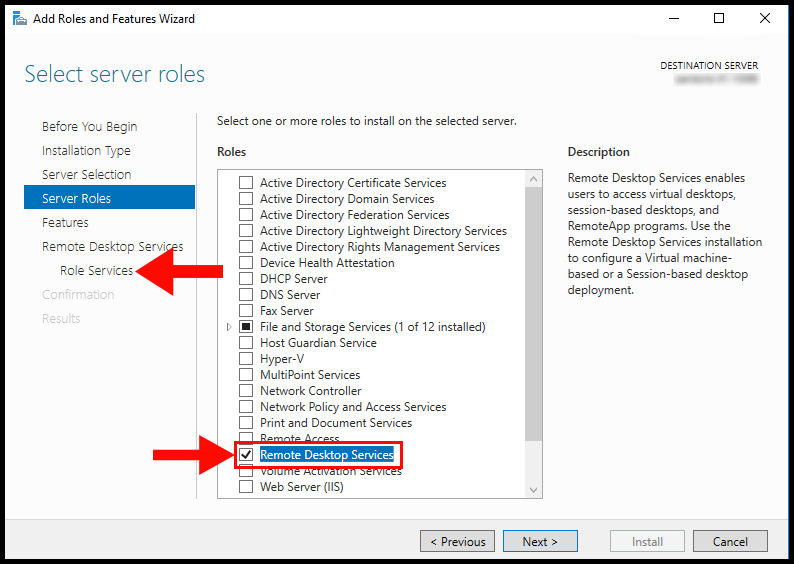
7. Check the box next to Remote Desktop Session Host on the Role Services tab.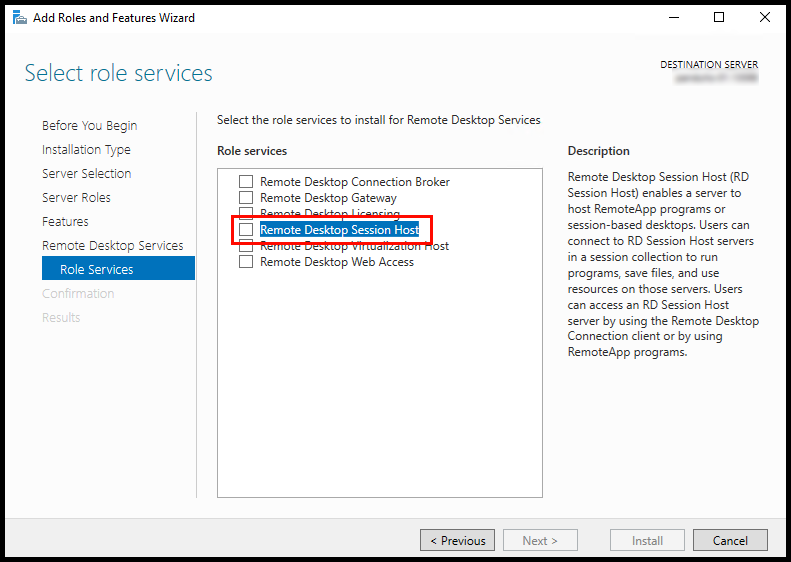
8. A new page will then appear; to proceed, click the Add Features option.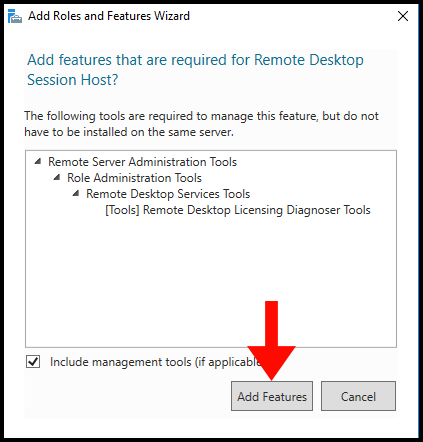
9. When you get to the Confirmation page, click Install to complete the process.
On the next page, you are given a choice of installation type. It would help if you put an active button to install roles or components. The next page gives you access to select the server. It would help if you chose a pool server from the offered options. And go to the next section.
Then, in the active window, you must select the line of server roles. The list of possible administrations will be opened. You need to check the box next to Remote Desktop Service.
The next step is to select the role service. Check the Remote Desktop Sessions node in the proposed list. After this step, a page with additional options will appear. Proceed to the final step of the installation. Click the install option at the bottom of the right corner. These simple steps will allow you to set up a remote audio remote desktop on any device quickly.
Any user can use the RDP microphone in any of these ways. However, it won’t allow you to access many options if your microphone is a professional model. For this reason, USBoNET from HighFigure can be helpful. You can move the device to your virtual environment and set it up how you want. Its software lets you adjust the microphone to your liking.